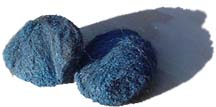
SOS Pads - These are basically briquet-sized little steel wool pads
saturated with a dry cleanser (similar to
Comet). Most people buy 'em for kitchen duty, to scrub the gook off the copper bottoms on their sauce pans
and skillets, but you'll find a lot of uses for these pads in your shop. Since this is basically
steel wool, these pads will scratch, so be careful what you use them on! They clean like a cleanser and
polish like fine steel wool and leave a nice clean, burnished finish. They'll remove soaked-in oil stains
and rub out light scratches and with extra pressure, they'll even remove old paint.
But they do leave fine scratches,
so be careful when using them on soft metal, like aluminum (but I've used them to buff off the oxidation
on an aluminum screen door and they left a beautifully smooth and semi-polished sheen that looked great). Don't use 'em on plastic or glass because they will scratch. They also may be too coarse for
aluminum or stainless steel side moulding. I've used these pads on a degreased engine block and sucessfully
removed some soaked-in oil stains. They're perfect for oil filler caps and gas caps and other "dull" bare metal pieces that you want to clean and burnish and won't be painting (if you're gonna paint the part, it's
easier to just use fine sandpaper since you don't care about the resulting "patina").
Like plain steel wool, if you go easy, SOS Pads can remove surface rust, overspray and
dirt from chrome bumpers, mirror arms, etc.
So, grab a pad and get it wet (not dripping wet!) and squeeze it a little to juice-up the cleanser and
you're ready to go. When you start, don't exert a lot of pressure until you get a feel for how the
scrubbing is affecting the surface. If the pad starts to get dry, get it wet again to release more
cleanser. When your scrubbing turns it into a tight ball of scratchy steel wool, throw it away and get a
fresh pad. If you have a lot to scrub, you might want to consider using rubber gloves. Always
scrub back and forth in the "long direction", so the scratches are all
going one way - because they'll be a lot easier to rub out later, than if you leave a roughed-up
surface of random
scratches going every which way. You can pick up a box of SOS Pads at virtually any Grocery Store.
Naval Jelly Rust Dissolver - This is a weird product, with a weird name, that's been around for
a long time. Its a bright pink
liquid that the Navy has supposedly used for years to remove rust from battle ships and other
mammoth-sized chunks of metal they have laying around. I once used it on a pile of cast iron
horse shoes that had been sitting out in the weather for years, and it easily removed all of the rust!
This stuff works great on heavily rusted and pitted; stamped or cast metal parts like; rims, hinges,
bus bumpers, bumper brackets and nuts and
bolts. It's a chemical, so obviously it's gonna do a number on fine finishes, so keep it away from
chrome, stainless steel, any painted (it will remove paint!) or polished surfaces,
and aluminum trim! It comes in a pump bottle and has a
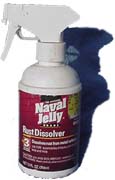
consistancy similar to liquid Turtle Wax, so lay your
rusty parts in a shallow pan (like an old casserole pan) so the "pink ooze" doesn't go everywhere.
Quickly rinse it off your skin if you accidently slop any of it on you, and as always - wear eye
protection when using this stuff. Squirt some jelly on the rusty parts and use a cheap paint brush
to spread it around so you get all the rusty surfaces thoroughly "wet" with jelly.
Then set the pan aside to let the parts soak like this over night. The next day you'll find that almost
all of the rust is gone and has been replaced with a dry milky-white residue that comes off easily
with water and a little scrubbing. After a thorough drying your parts will be ready for prep and paint.
I bought a 12oz pump-bottle of Naval Jelly "level-3" (this level is for "Extreme Rust Removal") for $5.49.
You should be able to find Naval Jelly at any decent Auto Parts or Hardware store.
Paint Thinner - This old favorite (also known as "Mineral Spirits" or "Turpentine") is an
important part of any restorer's clean-up arsenal. Mainly, paint thinner is great for de-greasing
oily or greasy parts. For smaller parts and nuts and bolts, you can drop them in a 1lb. discarded
Yuban/Folgers, etc. coffee can, pour in the thinner and let 'em soak for a while. For larger parts,
stop by the auto parts store and buy one of those 4" deep round metal pans used for catching oil
when you do an oil change. Lay your greasy parts in the pan, pour some paint thinner
over 'em (tilt the pan to create a deeper pool of thinner on one side) and use an old paint brush
(auto parts stores also sell stiff-bristled brushes especially for this purpose) to wet 'em down
with thinner. Every few minutes, go back and brush down the parts again with thinner to get all the
oil and grease out of every little crevice. Although more caustic that purpose-made "hand cleaners,
paint thinner is great for cleaning up your oily hands after a long day of tearing down your engine.
Note that paint thinner is a solvent for
enamel-based paints, almost all spray paint cans
(including Krylon) are
lacquer-based. So if you're getting ready to paint a part using a
can of spray paint, the final "wipe-off" of the bare part should be with lacquer thinner
never
paint thinner. The easiest place to find paint thinner, is the local hardware store. Buy a
gallon, you'll use it.
Lacquer Thinner - This is pretty potent stuff with pretty potent fumes, but you'll find it
very handy around the shop. Like we mentioned in the "Paint Thinner" write-up, almost all spray paint
cans (including Krylon) contain lacquer-based paint. So the last thing you should do before painting
parts with a spray can, is to wipe them down with lacquer thinner to remove any dirt, dust or oily
finger prints. After touching-up small gravel chips in your paint, pour a small amount of lacquer
thinner in small bowl to clean the paint out of the brush. Just got your ride back from the painter
and discovered that he got overspray on the bumper, tires and rims? No problem. Whip out a rag and your
can of lacquer thinner and get to work. Remember that lacquer thinner is a solvent so it'll quickly
disolve new paint. But light rubbing with a soft rag dipped in lacquer thinner will easily and safely
remove overspray from a paint job that's at least several months old. Don't use too much
lacquer thinner and don't rub very long in one spot (it's also good to wax the area after you're done,
to remove any traces of the lacquer thinner). Lacquer thinner works great on rubber (tire side-walls,
side trim, weatherstrip...), for removing paint overspray and restoring the finish back to its original
black patina. Lacquer thinner is also great for removing oil and paint overspray on chrome and glass.
But, keep lacquer thinner away from plastics which can melt or at least get soft. The easiest place
to find lacquer thinner is the hardware store. You won't need much, so a pint can should be fine.
Sand - I know it sounds weird, but sand can be very useful for some restoration tasks. If
you've got an old plastic brake fliud reservoir or plastic tank for the window washer, the inside will
usually have caked-on gunk or dirt, that you can't reach with a cleaning brush. Try pouring
a little dry sand into the plastic reservoir, cover the opening with your hand and then slosh and shake
the sand back and forth across the dirty area. It may take a while, but you may find that the abrasive
sand particles are just the answer for cleaning these hard-to reach areas. When you're all done, just make sure
you really rinse the reservior thoroughly, to remove every grain of sand! Dirt won't work for this,
so grab a small handful of sand from your kid's sandbox, or the local park's play area.
Rubbing Compound - By now you probably know that it's the fine, abrasive particles in car wax
that enables them to "rub away" dirt and oxidation from tired paint. Rubbing compound is
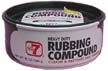
like car wax with much
larger abrasive particles, but it's potentially much more destructive than car
wax. Use rubbing compound to rub away surface scratches, "orange peel", scuffs and other slight imperfections
in a painted surface. Dip a dampened rag in the rubbing compound and rub the paste on gently, like you'd
apply paste wax, but don't apply much pressure and don't rub very long in the same spot. You'll
notice that your rag is stained with the color of your paint, because you are basically "sanding away"
your paint. Use this stuff sparingly, or you'll rub through your paint, right down to the primer!
Rinse and dry the area you're working on occasionally, and stop immediately once the imperfection has
been rubbed-out sufficiently, or it looks like the paint is getting thin. Since rubbing compound is essentially
sanding your paint, it will leave the surface dull, so once you're done rubbing out the problem
area, apply a good polish, then wax, to bring back the shine. It's probably not a good idea to use this
stuff on new paint, unless you really know what you're doing. You can find rubbing compound in small
metal or plastic tubs at most auto parts stores and some hardware stores. I've had best results with
the "No., 7" brand.
<
Polishing Compound - Polishing Compound is basically rubbing compound with finer abrasive
particles. It's used in the same way as rubbing compound, but since it's not as gritty, it's much easier
to monitor and control your progress, so there's less danger of rubbing through the paint, than with rubbing compound. Generally I begin with polishing compound
and if it's not removing the stain or scuff, then I step up to the rubbing compound. Polishing compound
is pretty useless on "orange peel" textures, but works great on light oxidation, old stains, and scuffs.
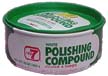
Polishing compound also works well on discoloration, stains and shallow scratches on plastics - like
brake fluid reservoirs, window washer tanks, tail light lenses, etc. Polishing compound is pretty
safe on paint, but check your progress often so you don't rub through. As with rubbing compound, you'll
want to polish and wax the paint when you're done using polishing compound. I prefer the "No. 7"
brand, which you should be able to find at most auto parts stores and some hardware stores.
Extend Rust Treatment - Extend is a milky white liquid that is designed to neutralize rust.
On insanely pitted and rusty metal, I'd use the Naval Jelly, but let's say you got a paint chip in
the front of your Kombi, that you forget to touch-up to keep the bare metal from rusting.
Now its a year later and that exposed metal has started to rust. if you do the paint
tough-up thing now, you're basically sealing in the rust - not good. Instead, paint a little Extend on
the rusted area to chemically neutralize the rust
before you apply the touch-up paint. First, try to
sand the loose chips of rust off using 80 or 100 grit sand paper, being careful to not scratch the
surrounding paint. Then shake up the bottle of Extend to mix it up, and pour a small amount in a
paper cup. Then use a small artist's paint brush to paint the area with Extend. Coat the entire exposed
area, but don't get it on the good paint around the paint chip (wipe it off the paint immediately with
water and detergent because it'll stain the paint). Wash out your paint brush in the sink and pour out
the Extend you had left in the paper cup. After about 20 to 30 minutes, shake up the Extend bottle again,
pour some more in another cup and paint on more Extend so its an even color. Again, rinse out the brush
and pour out the unused Extend. Now let the coated area dry for a couple of days, to fully neutralize the
rust. As part of the chemical reaction, the Extend coating will turn black. Now, you can prime and paint
the spot like usual. This is a chemical so never pour the un-used Extend back into the bottle,
and don't dip your brush directly into the bottle, because you'll trigger the "neutralizing reaction"
right in the bottle and ruin the whole batch! Extend is made by Permatex and you should be able
to find it at most auto parts stores, or have them order a bottle for you. An 8 oz bottle will
probably last you a lifetime (as long as you don't forget and dip your paint brush back in the bottle!).
Pam - Yeah, getting your girlfriend, Pam, to help you clean old car parts would be sweet, but
we're not talking about
that Pam. What we're talking about here is the non-stick cooking spray you use
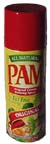
on a skillet to keep food from sticking. The big use for Pam in your shop is to remove stickers,
labels, decals and price tags. Using a screwdriver or razor blade to scrape an old sticker off your bus
bumper is definately gonna scratch up the paint. Instead, shake up the can of Pam and spray it on the
offending sticker to start softening up the sticker's glue. After a few minutes, spray on more Pam and you
should be able to use your fingernail or the edge of an old credit card to start picking at the edges
of the sticker and peeling it off. It will take a while, so be patient. But eventually you'll
have the sticker off and the stubborn layer of glue too. Pam also works great to remove price tags
that tear off easily but leave behind a sticky patch of glue. The best part is that Pam doesn't seem
to cause any damage to chrome or painted surfaces.
Wire Brushes - You can buy a package of assorted brass and stainless steel wire brushes
at the local hardware store. You should also have a large "painter's" wire brush. These brushes are
great for removing paint and light rust from bolt heads, bumper brackets and other cast or stamped
metal parts. They leave fine scratches that can be removed with fine grit sandpaper, if you're going
to be painting the part. For parts that will stay "bare", like gas caps, oil filler caps and bolt
heads, wire brushes leave a pleasing dull "burnished" finish. Experiment with the brass brush, and
the stainless steel brush, to obtain the finish you're looking for. But on these "bare" parts, make
sure you always brush back and forth in parallel strokes, because random strokes in a bunch of different
directions will just leave a "scratched up" finish. Sometimes brushing with a wire brush, followed by
#0000 steel wool rubbed in the same direction, will yield the best finish. To seal a bare part after
it's been "brushed", shoot it with several coats of Krylon's "Clear" spray paint.
Wire brushes can "fling" out loose wire bristles, so always wear safety goggles when brushing.
Metal Polish - "Metal Polish" is a paste similar to rubbing compound or polishing compound, that
is used to clean and polish certain types of metal (copper, brass, stainless steel...). It's not designed
to leave a brilliant shine (like waxing a chrome bumper would), but instead yields a deep lustrous finish.
Metal Polish is abrasive (I wouldn't use it on chrome), so first experiment with a small area
that won't be seen, to make sure that polishing won't leave scratches.
But it works great on stainless steel trim (like the old moulding around your bug's windows
- but keep it off the rubber) and stainless steel
hardware. There are lots of different brands out there, but I especially like Autosol's #1000 Metal Polish.
Paint Remover - Just about everyone knows about "Paint Remover". This is the thick stuff you
brush on wood or metal to chemically remove old paint and varnish. Most hardware stores carry Jasco's
"Premium Paint & Epoxy Remover" which works very well. Don't forget to buy some cheap "throw away"
paint brushes and a cheap aluminum "turkey basting" tray. This stuff is very caustic.
The fumes are nasty and if you get any of this gel on your skin, wash it off immediately because it burns like crazy. Wear rubber gloves and safety goggles and work outside if you can,
to avoid sniffing the fumes. Set the parts in the aluminum tray, pour a little of the paint remover over
them and use the cheap paint brush to evenly distribute the gel across the part (only brush in one direction
and brush sparingly). The old paint will start wrinkling and blistering immediately, but leave it alone
for at least 5 to 10 minutes so you loosen as much paint as possible.
Rinse off the part, and if there's still some stubborn paint, apply
another coat of paint remover. To remove paint from you car's body, look for "Aircraft Stripper"
at the Auto Parts store. This stuff is commercial grade and works great for removing large areas of
old paint. To simplify cleanup, spread out a plastic drop cloth where you're working, so the glop falls on the
drop cloth instead of the floor, as you scrape off the old paint with a putty knife. Keep this stuff
away from your Bondo patches because it turns plastic filler into the consistancy of "Silly Putty".
It's probably not a good idea to use paint remover in areas of the body that you can't thoroughly
rinse out (like inner door panels) because if it puddles in a hidden crevice and gets periodically damp, over
time it could start eating it's way through the metal. One other caution, only buy as much paint remover
as you think you'll need, because it does loose effectiveness over time and it has a dangerous habit
of eating it's way through the bottom of the can! Once the partially used can is 3 years old, I'd
recommend dropping it off at your town's "Hazardous Waste Recycling Station"
(don't just toss it in the trash can!).
Penetrating Oil - When you're faced with the task of trying
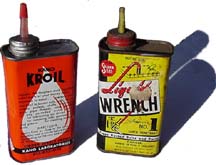
to loosen old, rusty fasteners that haven't
been touched for decades,
there's a good chance that you'll snap them off in the process. You can really increase the odds of successfully
unscrewing that nut or bolt, by first applying some "penetrating oil". There are several brands that work well,
and most mechanics have their favorite. We've had good success with "Liquid Wrench" and "Kroil", and
some folks swear by "WD-40". Whichever you choose, squirt a little of the penetrating oil on the
fastener's threads about a week before you plan to start wrenching, to give the oil time to seep into the joint
and loosen the years of dirt and rust that are lodged in the threads. Apply more of the oil
each day, and hopefully by the time you start wrenching, the bolt will come out easily.
Anti-Seize Compound - Restorers spend a lot of time busting loose old dirty and rusty nuts
and bolts. When it comes time to re-assemble everything, you'll want to make sure some of these fasteners
can be
easily unscrewed again in the future. "Anti-Seize compound" is the way you make this happen.
This paste comes in a tube and you squeeze a very small amount onto the threads and use your fingers
to spread it evenly over all the threads. Bolts that need to be backed out periodically,
like Lug nuts and spark plugs are great candidates for a little Anti-Seize compound. Your local
Auto Parts store will probably carry several different brands but we've had good success with
"LM-508 Anti-Seize Compound" by Lubro Moly. A 3.5oz tube will probably last you a lifetime.
Loc-Tite - This stuff is basically the opposite of "Anti-Seize Compound" and is used to
prevent
bolts from backing out on their own. It is manufactured by Permatex and comes in small plastic squeeze
bottles. A .08oz bottle will last you years, but your local Auto Parts store may only stock
the larger 1.22oz bottles. Permatex offers different grades of Loc-Tite "thread locker",
depending on how permanent you want the connection to
stay. For most applications, their #24240
Medium Strength Loc-Tite (the liquid is blue) works just fine.
When you coat a bolt's threads with blue Loc-Tite, it won't loosen on it's own, but you'll have no
problem removing the bolt later with a wrench. We've used blue Loc-Tite on water pump bolts and disc brake
caliper bolts (on our domestic pickup) just to make sure these critical parts stay attached. For bolts
you really don't want to come loose, try #26240
Permanent Strength Loc-Tite (red liquid).
Simple Green - Simple Green is a common household cleaner that will definitely come in handy in
your shop. We use for cleaning dirt, stains and mildew off vinyl upholstery and painted surfaces.
Look for it at the grocery or hardware store. A 16oz bottle will last you years.
Ajax & Comet Cleansers - This is another common household cleaner. It's pretty abrasive stuff and it can bleach out painted surfaces. But it works great for scrubbing whitewall tires sparkling white again.
It also works well on stained and grimy engine cases and old rubber floor mats with ground-in junk
between the ribs. Use it as a last resort on stained or dirty vinyl upholstery.
Carburetor Cleaner - This stuff works great for cleaning dirty engine parts. But it's a very
nasty chemical with toxic fumes, so for us it's a "cleaner of last resort". This stuff is like an acid
and you do
not want to inhale it or get it on your skin! Your Auto Parts store will sell it in a gallon
can that comes with a built-in parts basket. Open the lid, fill the parts basket with small parts,
or your dis-assembled carburetor, lower the basket back down into the cleaning solution
and quickly put the lid back on. It's a good idea to try to do this while
holding your breath
because one whiff of this stuff will give you a killer headache. Leaving the parts in the
solution overnight should do the trick. Wear a respirator and safety goggles and don't splash it on
your skin. Keep it away from plastic (like your plastic handled screw drivers - ask me how I know this!)
because it will dissolve plastic.
409 - Another common household cleaner. This stuff is a little stonger than "Simple Green"
and we primarily use it to clean dirt, grime and stains on vinyl upholstery. Also good for cleaning
greasy or oily fingerprints of white sidewall tires.
Easy Off Oven Cleaner - This caustic household cleaner works great when you need to scrub your
stained and grimy engine case parts. Wear rubber gloves, safety goggles and work in a well ventilated
area.
Scrubbing Pads - A few years ago,
companies started selling small plastic scrubbing
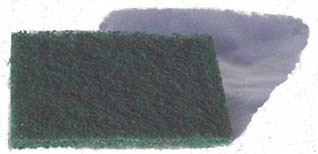
pads for household
cleanup chores. These pads are scratchy like steel wool or SOS pads, but they're not pre-loaded
with cleanser. The best part about these pads is that unlike steel wool or SOS pads, these plastic pads
won't scratch the surface you're trying to get clean. They work great on glass, stainless steel trim
and chrome surfaces that have hard, caked-on junk that just won't come loose with liquid cleaners.
The pads we use are 2" by 3" and you should be able to find them in grocery and hardware stores.
Mequiar's Gold Class Trim Detailer - Great for renewing black rubber (gaskets, grommets,
molding strips and weatherstriping), satin-black painted trim and old bake-lite or plastic knobs and handles.
Gunk - Gunk Engine Degreaser has been around for a long time. It's an effective degreaser
that's very easy to use. It can be used for a lot of heavy duty degreasing tasks,
but it's most practical usage is for removing caked-on grease that coats an engine block or suspension.
Buy a couple of spray cans of Gunk, drive your car around for 10 - 20 minutes to get the engine
good and hot and head for the "do-it-yourself" carwash. Wrap a piece of tin foil around the distributor,
coil, generator and air cleaner opening, put on your safety goggles and start spraying Gunk
on all of the greasy and oily areas you can reach. Let it sit for 5 to 10 minutes and then rinse
it off with the high-speed rinse wand (try to avoid soaking the electrical components).
You'll probably remove some engine paint in the process, and you might have to let things dry out
a bit before your engine will start, but this is a quick way to remove years of caked-on grease.
Rain-X - This is an amazing product that makes driving in a rainstorm almost fun. After
applying Rain-X to your windshield, you basically won't need to use your wipers when driving in a hard rain,
because the water will quickly bead-up and "dance" off to the sides of the windshield, as if by
magic! This stuff really improves visibility when driving in rain, sleet or snow,
and saves wear and tear on your wiper blades. You probably won't use it on your beloved VW,
that never touches water, but it's perfect for your daily driver Jetta.
Rain-x comes out of the bottle like water and you squirt some on a folded up paper towel
and carefully wipe it on your dry/clean windshield as if you were applying an even coating
of clear urethane or varnish to the glass. Follow the application directions on the bottle,
don't apply it in the direct sun, and make sure you polish it thoroughly with a paper towel after it dries,
to buff out the cloudy areas. Then immediately apply another layer, if you want the miracle coating
to last all season!


